
The six-step order that actually works, what to expect at each age, and the three mistakes that stop most preschoolers from learning to cut.
Quick answer
Most children can start snipping paper with child-safe scissors at around 2.5 to 3 years old and cut forward along a straight line by about 3 to 3.5. Fix the grip first, start with simple snips into strips of paper rather than cutting out pictures, and build up step by step to straight lines, curves and shapes.
Your child picks up the scissors. The thumb rolls sideways. Both hands clamp around the handles. The paper bends, folds, tears — and then comes the sentence every parent knows: “I can’t do it.”
The scissors go down. Nobody wants to try again tomorrow.
If that’s your kitchen table, nothing is wrong with your child. What’s usually wrong is the starting point. Most of us hand over a pair of scissors and a picture to cut out, and a picture is roughly step nine of a nine-step skill.
Here’s the order that actually works, what to expect at each age, and the specific fixes for the three problems that stop nearly every preschooler.
When should a child start using scissors?
Earlier than most parents think — and the first stage doesn’t involve a line at all.
| Age | What most children can do |
|---|---|
| 2 – 2.5 years | Hold scissors and open and close the blades |
| 2.5 – 3 years | Make small snips into the edge of the paper |
| 3 – 3.5 years | Cut forward along a straight line, roughly on it |
| 3.5 – 4 years | Cut a straight line accurately; start on gentle curves |
| 4 – 4.5 years | Cut out a circle and a square |
| 4.5 – 5 years | Cut out a triangle and simple objects |
| 5 – 6 years | Cut out detailed shapes and figures confidently |
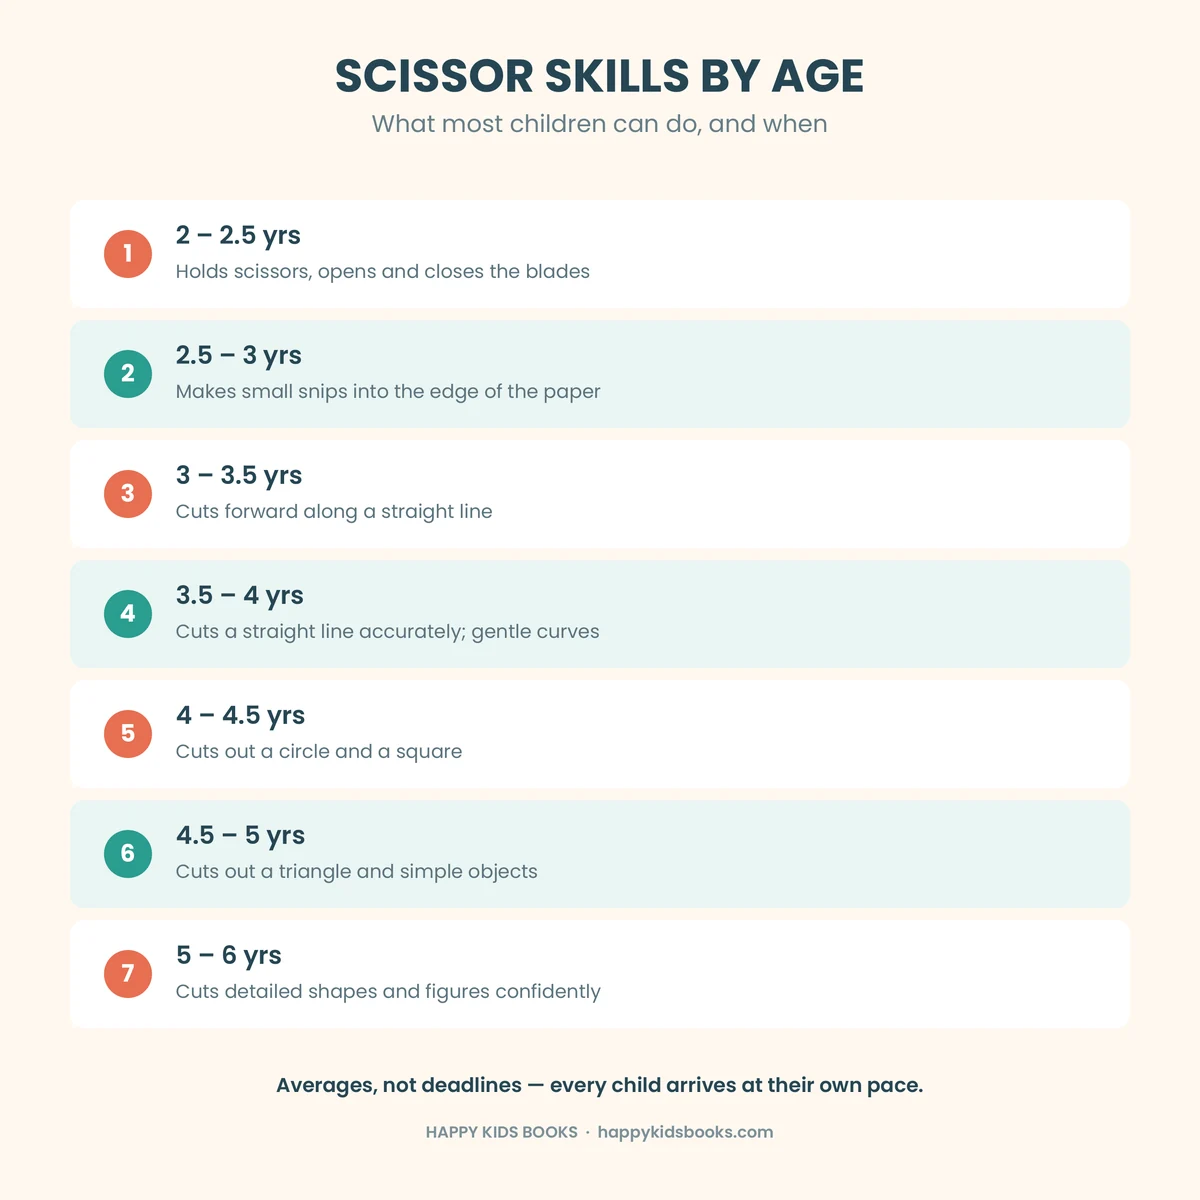
Two things to hold onto before you compare your child against that table.
These are averages, not deadlines. Occupational therapists share these ranges so you can tell what’s age-appropriate to practice, not what must be finished by a birthday. A child who cuts a square at five is not behind a child who did it at four.
Interest drives the gap more than ability does. Children who like sitting at a table with paper simply get more repetitions than children who’d rather be outside. Much of what looks like a skill difference at four is a practice difference.
Why cutting matters more than it looks
Cutting seems like a craft skill. It isn’t. It’s one of the most demanding fine-motor tasks a preschooler does, and it quietly builds four things at once.
Hand separation. This is the big one. Your hand has two halves that do different jobs — the thumb, index and middle fingers do precise work, while the ring and little fingers curl in and stabilise. Scissors force that split, because the two sides physically have to do different things. It’s the same split a pencil grip depends on.
Bilateral coordination. One hand cuts. The other holds and turns the paper. Two hands, two different jobs, at the same time. That’s the foundation for tying shoes, using a knife and fork, and steadying a page while writing on it.
Hand strength. Opening and closing the blades against paper resistance is genuine muscle work for a small hand.
Motor planning. Before the blades close, your child has to look at the line, decide where the cut goes, and sequence the movement. That’s a thinking skill wearing a craft skill’s clothes.
This is why occupational therapists take cutting seriously as a school-readiness marker. The hand that can cut a line is usually the hand that’s ready to hold a pencil properly — and pencil grip is one of the things that makes the first year of school easier. If you’re thinking about school readiness more broadly, we’ve written a fuller guide on what kindergarten readiness actually looks like.
Fix the grip first
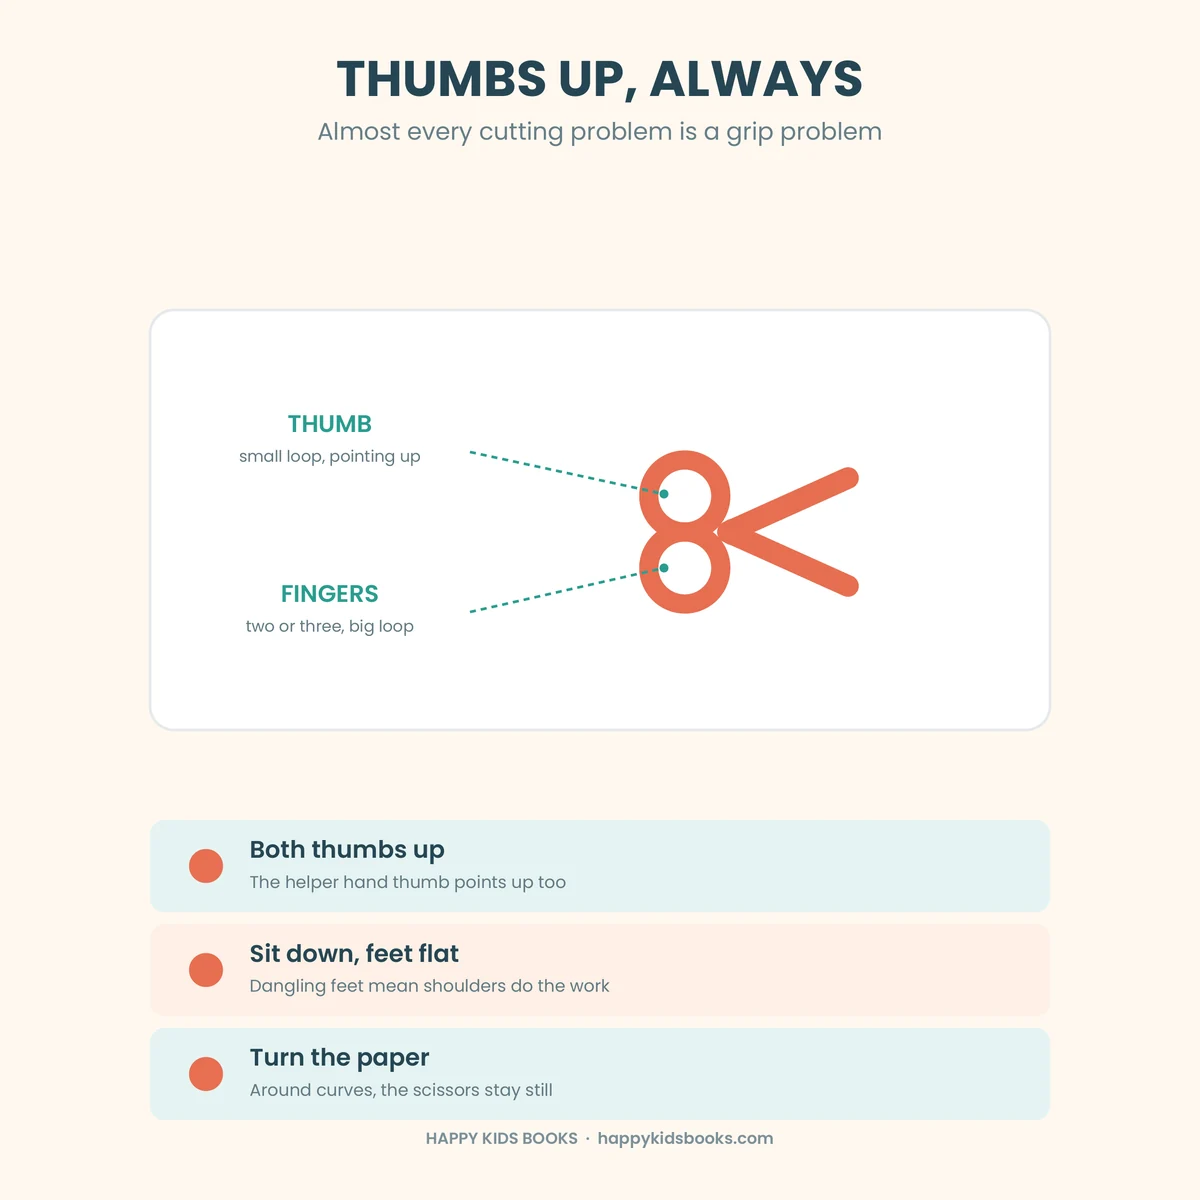
Almost every cutting problem is a grip problem in disguise. Get this right and half the frustration disappears in one session.
Thumb up, always. The thumb goes in the small loop, pointing at the ceiling. Two or three fingers go in the big loop. The moment the thumb rolls sideways, the blades stop meeting properly and the paper starts bending instead of cutting.
The phrase that works with three-year-olds is “thumbs up, like you’re saying good job.” Say it every time. Don’t correct the hand silently — name it, and they’ll start catching it themselves.
Both thumbs up. The helper hand matters just as much. That thumb should point up too. It stops the wrist rolling over, which is what makes the cut wander off the line.
Sit down, feet flat. A child standing at a table braces with their shoulders instead of their fingers. Feet flat on the floor, bottom on the chair. If their feet dangle, put a box under them.
Turn the paper, not the scissors. Around a curve, children instinctively twist their wrist. It doesn’t work — the blades lose their angle. Teach the opposite: the scissors stay pointing forward and the helper hand rotates the page into them.
The six steps, in order
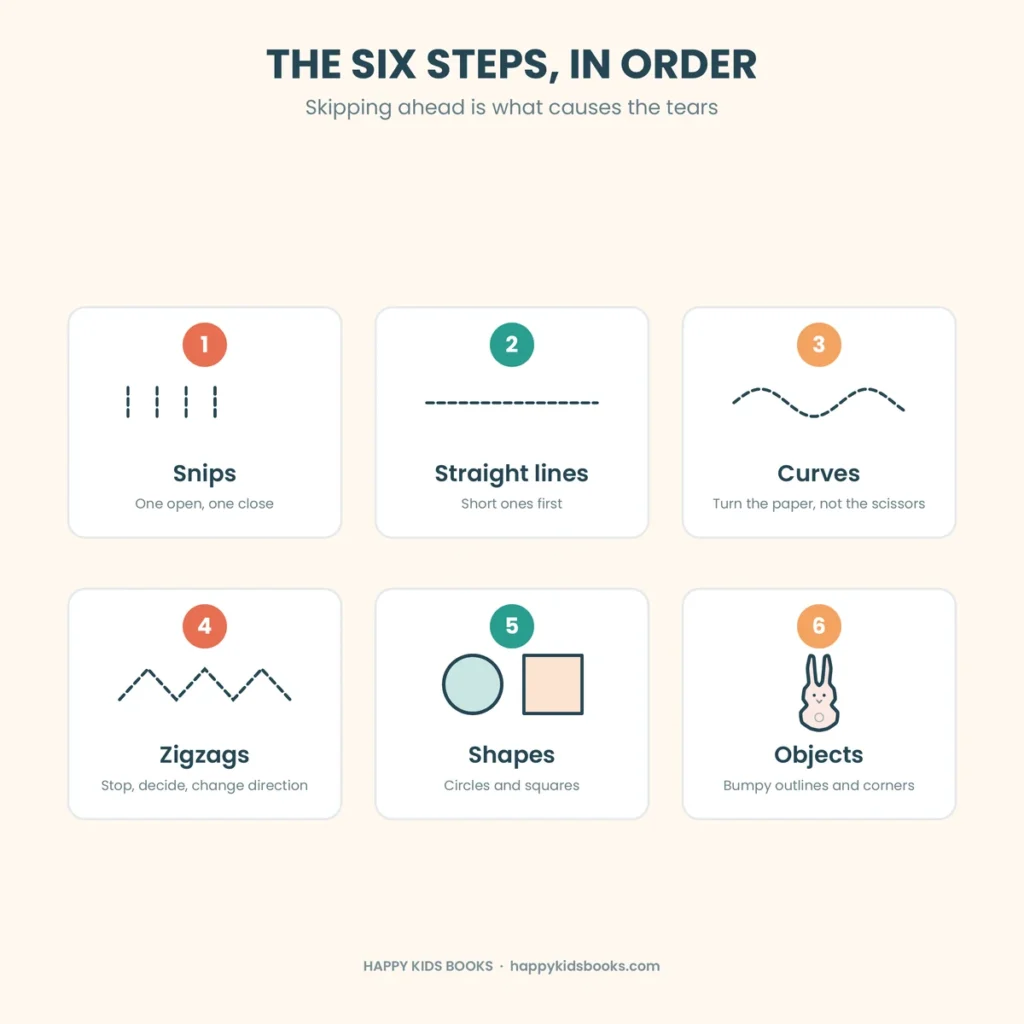
This is the sequence occupational therapists use, and the reason it works is that each step builds the control the next one needs. Skipping ahead is what causes the tears.
1. Snips. Not cutting — just one open, one close, into the edge of a strip. Cut a sheet of paper into strips about 1.5 inches wide and let them fringe the edge. One snip is one success. Confetti is a completely legitimate outcome.
2. Straight lines. Short first — two inches, not a full page. A tired hand near the end of a long line is where accuracy falls apart and frustration starts.
3. Wavy and curved lines. Gentle curves only. This is where “turn the paper, not the scissors” gets taught properly.
4. Zigzags. Harder than curves, and worth doing on purpose. A zigzag needs a full stop, a decision, and a change of direction — three things a smooth curve never asks for.
5. Simple shapes. Squares and circles first. Now they’re cutting a closed outline and coming back to where they started, which is a different mental task from cutting across a page.
6. Objects and figures. Bumpy outlines, corners, small changes of direction. This is the finish line for the preschool years.
Everything you need for step 1 through 6, ready to print
Working through those six steps means finding, printing and sequencing dozens of the right sheets at the right difficulty. That’s the part that quietly doesn’t happen.
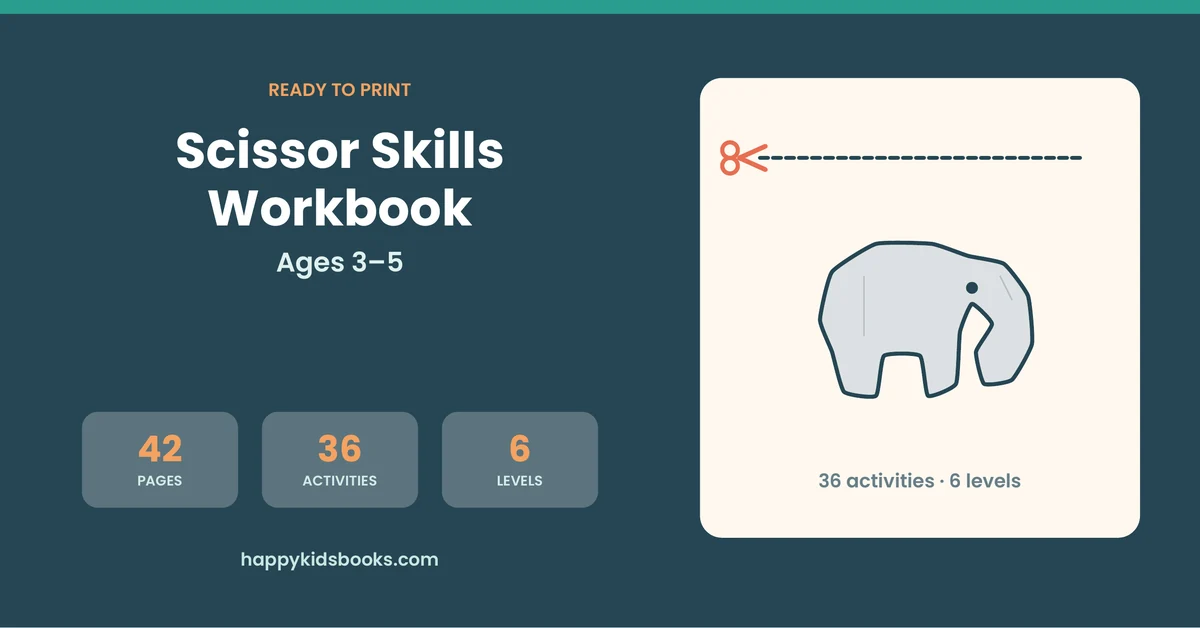
The Scissor Skills Workbook for Kids Ages 3–5 is that whole sequence, already built and already in order.
- 36 cutting activities across six levels — straight lines, wavy lines, zigzags, shapes, everyday objects, animals
- 6 cut-and-paste scenes — fill a plate, stock the sea, hang the washing, top a pizza, build a face
- A parent guide covering grip, posture and how long a session should last
- A “Super Snipper” certificate to sign and date at the end
- 42 pages, US Letter and A4, instant download
Every shape is drawn deliberately chunky — no thin ears, no narrow stems, nothing a three-year-old will tear halfway through. Cut lines print thick and dashed so children can see “cut here” at a glance, and a small scissors marker shows exactly where to start each one.
And because it’s a printable, it doesn’t get used up. A paperback cutting book is one child, one go. This one prints again tomorrow, for the next child, and the one after that.
Get the Scissor Skills Workbook →
The three mistakes almost everyone makes
Starting with a picture. A cut-out shape is step five or six. Starting there is like handing someone a novel to teach them the alphabet. Start with snips, even if your child is four.
Sessions that run too long. Five to ten minutes is plenty for a three-year-old. Stop while they’re still enjoying it — not when they’ve had enough. Ending on a good moment is what makes them willing to start again tomorrow.
Cheap scissors. This is the one that surprises people. Most “safety scissors” in bargain packs don’t actually cut paper — the blades bend it. Your child is then failing at a task that is genuinely impossible, and concluding they’re bad at cutting. Spend a little on a proper preschool pair with rounded tips, and check they cut cleanly yourself before handing them over.
Left-handed? Buy left-handed scissors
Not the “ambidextrous” ones with two round loops. Genuinely left-handed scissors, with the blades reversed.
The reason is simple: on right-handed scissors, the upper blade sits on the right, so a right-handed child can see the cutting line as they work. A left-handed child using the same pair has the blade covering the line. They are cutting blind and compensating by twisting their wrist — which then looks like poor coordination.
It isn’t. It’s the wrong tool. Left-handed scissors fix it immediately.
When to ask someone
We make printable workbooks — we’re not occupational therapists, and nothing here is a diagnosis. But it’s worth knowing what the professionals say is worth a conversation.
Consider mentioning it to your doctor or asking about an occupational therapy assessment if, well past the ages in the table above, your child:
- Still can’t hold scissors in one hand
- Tires very quickly, after just a few cuts
- Avoids cutting altogether, consistently
- Struggles across many fine-motor tasks — buttons, pencils, threading, cutlery
That last point is the important one. One difficult afternoon is an afternoon. A pattern across several different fine-motor activities, over months, is worth asking about — and asking early is always better than waiting.
Frequently asked questions
At what age should a child be able to cut a straight line? Most children cut along a straight line somewhere between three and four years old, and cut one accurately by about four. Making the first snips into the edge of paper comes earlier, around two and a half.
Should I let my 2-year-old use scissors? With close supervision and proper preschool safety scissors, yes. At two the goal isn’t cutting anything in particular — it’s just learning to open and close the blades and make one snip. Stay within arm’s reach the whole time.
What kind of scissors should a preschooler use? Blunt-tipped preschool scissors that genuinely cut paper. Some have a spring that reopens the blades automatically, which helps children who don’t yet have the strength to open them alone. Left-handed children need true left-handed scissors, not the “either hand” kind.
How long should a cutting session be? Five to ten minutes for a three-year-old, a little longer at four or five. Stop before frustration arrives, not after.
Does cutting really help with handwriting? It helps with the foundations. Cutting builds hand strength and the separation between the working and stabilising sides of the hand — both of which a mature pencil grip depends on. It isn’t handwriting practice, but it’s part of what makes handwriting possible.
The one thing to take away
Go in order, and keep it short.
Almost every child who “can’t cut” has simply been handed step six on day one. Start with a single snip. Let them make confetti. Give them a straight line tomorrow. The skill builds itself if the steps are small enough — and a child who succeeds on Monday will pick the scissors back up on Tuesday.
That’s the whole trick.
Start with the Scissor Skills Workbook for Ages 3–5 → 42 pages · 36 activities · Instant printable download
Get new printables in your inbox
Join other parents getting new printable pages, freebies and simple at-home learning tips. No spam, unsubscribe anytime.